


What is Symmetric Encryption?
Definition: Symmetric Encryption Symmetric encryption is a cryptographic method where the same key is used for both encrypting and decrypting data. It is one of the foundational encryption techniques used
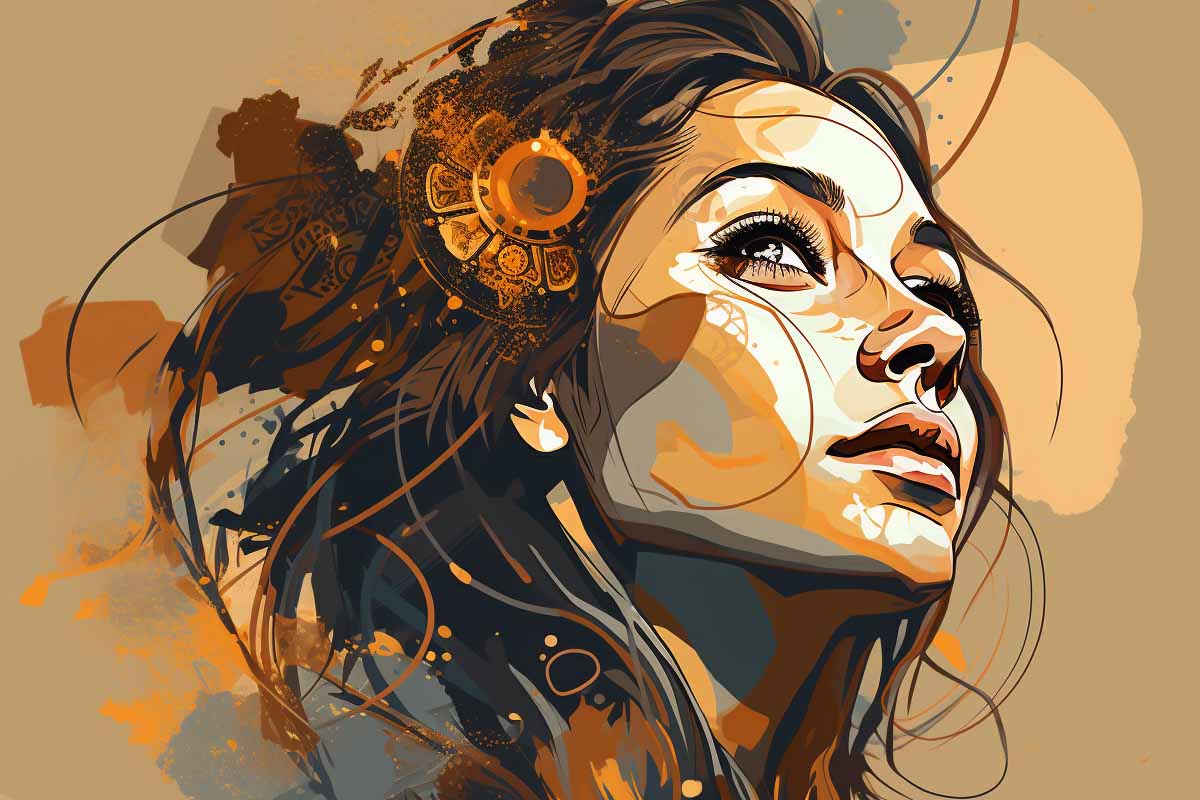
Adobe Illustrator is a software commonly utilized by graphic designers and artists to create vector illustrations and graphics. Adobe Illustrator is a software that offers a variety of tools and features for creating vector graphics. Unlike raster images, which are made up of pixels, vector graphics are created using mathematical equations and can be resized without losing quality. One of the popular tools in Adobe Illustrator is the pen tool, which allows artists to create precise and detailed designs. With its user-friendly interface and extensive capabilities, Adobe Illustrator is widely used for producing professional and high-quality vector art. Whether you are designing logos, illustrations, or infographics, Adobe Illustrator offers the tools and flexibility to bring your ideas to life.
Benefits of Vector Art in Digital Art Creation
– Scalability: One of the significant benefits of vector art in digital art creation is its scalability. Unlike raster images, which pixelate and lose quality when enlarged, vector art maintains its smooth lines and sharp edges at any size. This is particularly beneficial when creating artwork for various mediums such as print or web.
– Versatility: Vector art allows for easy editing and manipulation of shapes and colors. Using tools like the pen tool in Adobe Illustrator, artists can create complex and detailed illustrations with precise lines and curves. This versatility enables artists to bring their creative visions to life and make adjustments efficiently without sacrificing image quality.
– Maintaining Image Quality: Vector art is resolution-independent, which means it doesn’t lose quality when scaled up or down. This is crucial, especially in professional digital art projects that require high-quality output. By using vector art, artists can ensure that their artwork looks crisp and clear in various applications.
– Easy Editing: Vector art software, such as Adobe Illustrator, provides a wide range of tools and functionalities that make editing and manipulation easy. Artists can easily change shapes, colors, and other elements of their artwork, allowing for quick and efficient adjustments. This flexibility is particularly useful when working on projects that require frequent revisions or updates.
In conclusion, vector art offers several benefits to digital art creation. Its scalability, versatility, ease of editing, and ability to maintain image quality make it an essential tool for artists seeking to create stunning and professional illustrations.

Whether you’re an aspiring graphic designer or illustrator, this course is your golden ticket to honing your skills and creating awe-inspiring designs. It’s time to turn your creative dreams into reality!
Adobe Illustrator is a software tool used by professionals and hobbyists for creating vector graphics and illustrations. It offers a variety of tools and features to assist users in bringing their creative visions to life, regardless of their level of experience. To get started with Adobe Illustrator, the first step is to familiarize yourself with the user interface. The workspace consists of various panels and menus, such as the Layers panel and Brushes panel, which allow you to access different tools and functions. The selection tool, pen tool, and shape tool are among the popular tools you’ll be using frequently. Once you’re comfortable with the interface, you can start creating your first vector artwork by either importing a pencil sketch or starting from scratch. Adobe Illustrator’s tools, such as the Pen tool, enable you to create smooth and precise lines, while the color palette allows you to choose and apply colors to your shapes. By using layers, you can organize your artwork and make adjustments to individual elements easily. Additionally, Illustrator offers blending modes and gradient options to add depth and dimension to your illustrations. With practice and experimentation, you can create stunning vector graphics and unlock the endless possibilities of Adobe Illustrator.
Setting Up Your Workstation for Converting a Sketch to Vector Art in Adobe Illustrator
– Optimizing your workstation is crucial when converting a sketch to vector art in Adobe Illustrator.
– This ensures that you have a seamless and efficient workflow, resulting in high-quality vector illustrations.
– Here are some necessary steps to take:
– Adjust the color of the sketch: Before starting the conversion process, it’s essential to tweak the image’s color using Adobe Photoshop or any other image editing software. This ensures that you have a clear and vibrant starting point.
– Save the sketch as a JPEG file: Once the color adjustments are made, save the hand-drawn sketch as a JPEG file. This format is widely compatible with Adobe Illustrator and maintains the image’s quality.
– Open the sketch in Adobe Illustrator: Launch Adobe Illustrator and open the saved JPEG file of your hand-drawn sketch. This allows you to work on the digital version while keeping the original image intact.
– Lock the image layer and adjust opacity: To prevent accidental modifications to the original sketch, lock the image layer. Lowering the opacity of the image layer helps you create precise vector paths by tracing over the sketch.
– Begin creating the digital version: Use Adobe Illustrator’s powerful tools like the pen tool, shape tool, and brushes panel to start converting the sketch into vector art. Work on separate layers and utilize the color picker to match the original drawing’s color palette.
– Optimize your workspace for efficiency: Set up customized panels, keyboard shortcuts, and workspace layout in Adobe Illustrator according to your preference. This enables quick access to essential tools, saving you time and effort.
By setting up your workstation properly, you can convert your hand-drawn sketches into stunning vector illustrations with ease and precision. Follow this Adobe Illustrator sketch to vector tutorial to elevate your digital art skills and create professional-grade vector graphics.
When working with Adobe Illustrator for sketch to vector tutorial, understanding the interface is essential to navigate the software efficiently. Here’s a breakdown of the key elements and functionalities:
– Interface Overview: The Adobe Illustrator interface consists of various components. The workspace provides a canvas for your artwork. The document window displays your current project, and the control bar offers quick access to frequently used tools.
– Panels and Navigation: Adobe Illustrator features several panels that can be accessed via the Window menu. These panels provide additional functionality and customization options. You can customize the workspace by dragging panels to specific locations. To navigate between panels, simply click on their respective tabs.
– Important Panels: The Layers panel allows you to organize your artwork into different layers, making it easier to manage complex illustrations. The Brushes panel offers a wide range of brush styles and settings, allowing you to create unique and artistic brush strokes.
– Customization: Adobe Illustrator allows you to customize the interface according to your preferences. You can create custom workspaces, set up keyboard shortcuts, and rearrange panels to optimize your workflow.
Understanding the Adobe Illustrator interface is crucial for a seamless sketch to vector conversion process. By familiarizing yourself with the various components and panels, you can navigate the software efficiently and create stunning vector illustrations.
Understanding the Toolbar and Panels in Adobe Illustrator
– The Toolbar: The toolbar in Adobe Illustrator is located on the left-hand side of the interface and contains various tools that are essential for creating vector art from sketches. Some important tools include:
– Pen tool: This tool allows you to create precise and smooth vector paths using anchor points and control handles. It is particularly useful for creating detailed and intricate artwork.
– Pencil tool: The pencil tool simulates a pencil or pen stroke, allowing you to create freehand sketches that can be converted into vector paths.
– Brush tool: With the brush tool, you can create different brush strokes and apply various brush styles to your artwork. It offers a wide range of options for creating unique and artistic effects.
– The Panels: Adobe Illustrator also features panels that provide additional options and settings for each tool, allowing users to customize their workspace. Some important panels include:
– Layers panel: The layers panel allows you to organize your artwork into different layers, making it easier to manage complex illustrations. You can create and arrange layers, adjust their opacity, and apply blending modes to create different effects.
– Brushes panel: The brushes panel offers a wide range of brush styles and settings, allowing you to create unique and artistic brush strokes. You can choose from different brush libraries, adjust brush attributes, and create your own custom brushes.
Understanding the toolbar and panels in Adobe Illustrator is essential for creating vector art from sketches. By utilizing the various tools and customizing the settings in the panels, you can create stunning and professional vector illustrations.
– Pen tool: This tool is used to create precise and smooth vector paths by adding anchor points and control handles. It is perfect for creating detailed and intricate artwork.
– Pencil tool: The Pencil tool simulates a pencil or pen stroke, allowing you to create freehand sketches that can be converted into vector paths. It gives a more organic and hand-drawn feel to your artwork.
– Brush tool: With the Brush tool, you can create different brush strokes and apply various brush styles to your artwork. This tool offers a wide range of options for creating unique and artistic effects. It’s ideal for adding texture and depth to your illustrations.
– Live Paint Bucket tool: The Live Paint Bucket tool is used for filling in color. It makes the process of filling shapes or areas with color quick and easy. You can apply colors to vector paths, shapes, or even multiple selected objects simultaneously.
Using a variety of brushes is important in Illustrator because it helps you create realistic textures and effects in your artwork. Brushes allow you to create different stroke styles, such as calligraphy, watercolor, or even a pencil stroke. They add depth and dimension to your illustrations, making them visually appealing and unique.
By utilizing these commonly used tools, you can easily transform your sketches into high-quality vector artwork in Adobe Illustrator.
Introduction
Adobe Illustrator is a powerful software commonly used by designers and illustrators to create vector graphics. One of the key features of Illustrator is its ability to convert pencil sketches into digital vector artwork. This process allows artists to maintain the organic and hand-drawn feel of their original sketches while taking advantage of the benefits of working with vector graphics, such as scalability and versatility. In this tutorial, we will explore the various tools and techniques in Illustrator that can be utilized to convert a sketch into high-quality vector art. From using the pen tool to trace and refine the lines of the sketch to applying color layers and shapes, this tutorial will guide you through the step-by-step process of transforming your pencil sketches into stunning, professional vector illustrations.
– Begin by importing your image into Adobe Illustrator.
– Create a new layer and rename it “Sketch Layer.”
– Use the pencil tool or the brush tool with light strokes to sketch the main outlines and details of your image.
– Avoid shading or adding any gradients at this stage, as we want to focus on creating clean lines.
– Take care to draw the lines with no gaps or breaks, ensuring a solid outline of your image.
– Remember to take your time and be precise, as the quality of your sketch will impact the final vector artwork.
– Once the sketch is complete, scan it into your computer using a high-resolution scanner to capture all the details accurately.
– Save the scanned image as a digital file, preferably in a format compatible with Adobe Illustrator, such as JPEG or PNG.
– Now, you’re ready to begin the vector conversion process by tracing your pencil sketch using the pen tool or the pen and anchor point tool.
– Fill in the shapes created by your vector paths using the color picker and the color palette.
– Divide your artwork into different color layers to make editing and adjusting colors easier.
– Experiment with different styles and techniques, such as gradients or solid colors, to bring your sketch to life.
– Remember to save your progress regularly to avoid loss of work.
– With the versatility and precision of Adobe Illustrator, you can turn your pencil sketch into a stunning vector graphic.
In conclusion, creating a pencil sketch of an image in Adobe Illustrator is the starting point for turning it into a vibrant vector illustration. By following these steps and paying attention to detail, you can achieve beautifully clean lines and accurate reproduction of your original sketch.
– Begin by ensuring that your pencil sketch is clean and free of smudges or eraser marks. Use a good quality eraser to tidy up any unwanted lines or marks.
– Scan your sketch at a high resolution (300 dpi or higher) to capture all the details accurately. Save the scanned image as a digital file, preferably in a format compatible with Adobe Illustrator, such as JPEG or PNG.
– Open Adobe Illustrator and create a new file. Set up the document with the same dimensions as your scanned image to maintain the original proportions.
– Import your scanned sketch into the Illustrator file and place it on a new layer. Rename the layer to “Sketch Layer” for easy reference.
– Lower the opacity of the sketch layer to around 30-50% so that you can see it clearly but it doesn’t distract from your vector work.
– Create a new layer above the sketch layer and rename it to “Ink Layer” or “Vector Layer”.
– Use the Pen Tool or the Pen and Anchor Point tool to digitally ink your sketch. Start by tracing the main outlines and details of your image with smooth and precise vector lines. Take your time to ensure perfect lines without any gaps or breaks.
– Avoid using brush strokes at this stage to maintain clean and uniform lines. You can experiment with brush styles later if desired.
– Remember to use the Undo command or the Eraser tool to correct any mistakes or stray points.
– After you have finished digitally inking your sketch, you can hide or delete the sketch layer. Your digital vector artwork is now ready for further refinement and colorization.
Remember, the resolution of your scanned sketch, setting up the Illustrator file correctly, and digitally inking with clean vector lines are essential steps in preparing your sketch for vectorizing in Adobe Illustrator.
Using the Pen Tool for Vectorizing Your Image:
– Open your image in Adobe Illustrator and create a new layer for your vector artwork.
– To trace the outlines of your image, begin by selecting the Pen Tool from the toolbar and use straight and curved lines.
– Use anchor points to create precise corners and curves, adjusting the handles as needed.
– Take your time to ensure accuracy and smooth lines without any gaps or breaks.
– Save your progress frequently to avoid losing any work.
– Once you have finished tracing the outlines, you can delete or hide the original image layer.
– Refine your vector artwork by adjusting anchor points and curves if necessary.
– To colorize your vector artwork, create new layers for different color areas and use the Shape Tool to create vector shapes.
– Use the Color Palette to select and apply colors to your shapes.
– Experiment with different color combinations and gradients to enhance your vector illustration.
– Remember to use the Undo command or the Eraser Tool to fix any mistakes or stray anchor points.
– By using the Pen Tool, you can easily transform your image into a scalable and editable vector graphic in Adobe Illustrator.
– To add color to your vectorized image in Adobe Illustrator, use the Selection Tool to select the shape or group of shapes you want to apply color to.
– In the Color panel, choose a color from the Color Picker or use the Eyedropper Tool to sample a color from your reference image.
– Use the Eyedropper Tool to sample different colors and create a color palette for your artwork.
– To edit color groups, go to Window > Swatches to open the Swatches panel. Here, you can create, edit, and organize color groups.
– Use the Selection Tool to select and delete shapes if you want to modify or change their color.
– To modify or expand specific color groups, use the Direct Selection Tool to select a shape within the group and edit its color properties.
– To add additional colors or fill empty spaces, use the Pen Tool or Brush Tool to draw shapes and apply color to them in the same way as previously described.
– Experiment with different blending modes and opacity levels to achieve desired effects.
– Once you are satisfied with your vector artwork, double-check for any stray anchor points or mistakes and make necessary adjustments.
– Save your work and export your final vector illustration in the desired file format.
Overall, adding color and final touches to your vectorized image in Adobe Illustrator allows you to bring your artwork to life and create a visually appealing design.
– Use the Pen Tool and the Shape Tool to create clean and precise lines and shapes in your vector artwork.
– Take advantage of the Brush Tool to add depth and texture to your illustrations by experimenting with different brush styles.
– Optimize your workflow by organizing your layers and utilizing the Layers panel to easily manage and edit your artwork.
– To maintain image quality, make sure to work with vector images instead of raster images to avoid any loss of quality.
– Create a color palette for your artwork by using the Eyedropper Tool to sample colors from a reference image or using the Color Picker to select colors manually.
– Try to balance your color choices by using a mix of warm and cool colors or experimenting with bright and muted tones.
– Remember to use the Gradient Tool to create smooth transitions between colors and add depth to your illustrations.
– If you want to achieve transparency effects or remove backgrounds, utilize the Transparency panel to adjust opacity and create transparent shapes.
– Experiment with different blending modes in the Transparency panel to create interesting and unique effects.
– To speed up your workflow, make use of keyboard shortcuts for commonly used tools and features.
– Regularly save your work and consider creating backup files to avoid losing any progress.
– Lastly, don’t be afraid to experiment and have fun with your vector art. Embrace the versatility and creativity that Adobe Illustrator offers.
Troubleshooting Common Issues with Adobe Illustrator Vectors:
– Distorted Shapes: If you encounter distorted shapes in your vector artwork, check if there are any open or overlapping paths. Use the Direct Selection Tool to modify paths and ensure they are properly connected.
– Loss of Quality: To avoid any loss of quality in your vectors, it is important to work with vector images instead of raster images. Vector images can be scaled up or down without any loss of detail.
– Difficulty in Editing: If you are struggling to edit your vectors, check if the paths are locked or grouped. Unlock the paths and ungroup them to make them easily editable.
– Adjusting Image Trace Settings: When using the Image Trace function, experiment with different settings such as threshold, minimum area, and corner angle to get the desired results. This will help you convert your sketches into clean vectors accurately.
Remember to regularly save your work and consider creating backup files to avoid losing any progress. By troubleshooting these common issues, you can enhance your workflow and create flawless vector illustrations with Adobe Illustrator.
Keywords: Troubleshooting, Adobe Illustrator vectors, distorted shapes, loss of quality, difficulty editing, adobe illustrator sketch to vector tutorial.
Video tutorials are a fantastic resource for learning how to convert sketches into vectors using Adobe Illustrator. These tutorials cover a range of topics, including sketching techniques, scanning and digitizing sketches, utilizing the pen tool for vectorizing, adding color and final touches, and troubleshooting common issues.
By following along with these step-by-step videos, you’ll gain a solid understanding of the process and be able to create stunning vector illustrations. Whether you’re a beginner or an experienced artist, these tutorials are designed to help you harness the power of Adobe Illustrator for your digital artwork.
To start, learn various sketching techniques to create a solid foundation for your artwork. Next, discover how to scan or photograph your sketches and convert them into digital files. Then, explore the power of the pen tool and how to use it effectively to create your vector paths.
Once your vectors are in place, you can move on to adding color and final touches to your artwork. Learn how to work with color layers, color shapes, and even utilize a color palette. Discover how to create flat colors or apply gradients for more depth and dimension.
Lastly, these tutorials also offer troubleshooting tips for common issues you may encounter along the way, such as distorted shapes or difficulties in editing your vectors.
With these video tutorials, you’ll be on your way to creating beautiful vector illustrations in no time. So dive in, follow along, and unlock the full potential of Adobe Illustrator for your digital artwork.
Ready to supercharge your career?
Plunge into our expansive library of Adobe courses and discover the keys to unlocking your professional potential.
Whether you’re a design novice or a veteran, we’ve got a course custom-crafted just for you. So, what’s holding you back? Set sail on this thrilling educational voyage and catapult your career to unprecedented heights now!