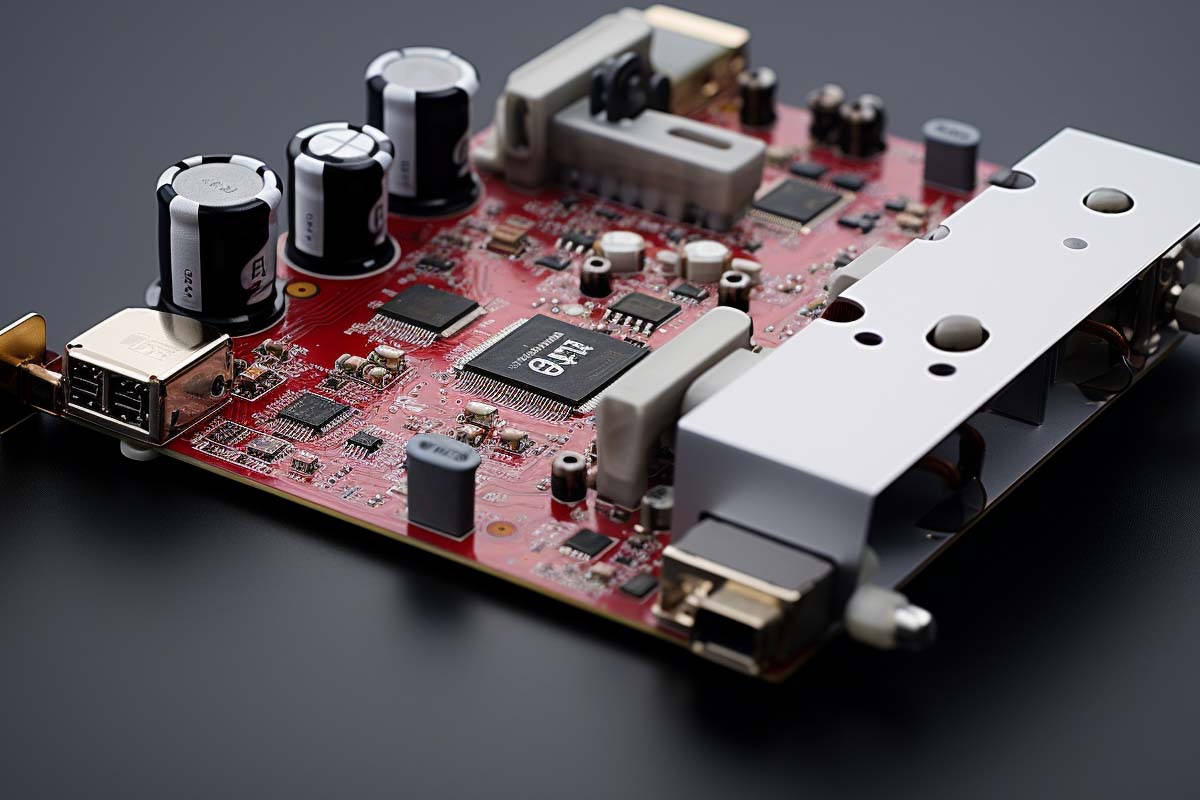
A customer has brought a computer in to be repaired. He said he thinks that the sound card has stopped working because no audio is produced when music, video, or DVDs are played. That symptom feels simple, but it usually is not. In most repair jobs, the real fault is a driver, output setting, cable, or application problem hiding behind what looks like a dead sound device.
CompTIA A+ Certification 220-1201 & 220-1202 Training
Master essential IT skills and prepare for entry-level roles with our comprehensive training designed for aspiring IT support specialists and technology professionals.
Get this course on Udemy at the lowest price →Quick Answer
To troubleshoot a suspected sound card failure, start with the easiest checks first: confirm the symptom, verify volume and output selection, test speakers or headphones, check Windows sound settings, reinstall or roll back the Driver, and inspect cabling and ports. True hardware failure is less common than configuration or software problems, so isolate each layer before replacing parts.
Quick Procedure
- Confirm the symptom with a known-good audio file.
- Check system, app, and hardware volume levels.
- Select the correct output device.
- Test with known-good headphones or speakers.
- Inspect Windows sound settings and device status.
- Reinstall, roll back, or update the audio driver.
- Check cables, ports, and front-panel audio connections.
| Primary Problem | No audio from music, video, DVDs, or system sounds |
|---|---|
| Most Common Root Causes | Driver, output device selection, cabling, OS settings, app routing |
| Fastest First Test | Play a known-good system sound and test with known-good headphones |
| Best Isolation Method | Compare behavior in Windows, a live USB, and a different user profile |
| Hardware Failure Indicator | Failure persists across OS, user account, and known-good accessories |
| Workaround | USB audio adapter or external audio interface |
| Relevant Support Skill | Structured troubleshooting used in CompTIA A+ Certification 220-1201 & 220-1202 Training |
Introduction
No audio can break a video call, stop training playback, ruin a gaming session, and make production work grind to a halt. When a user says “the sound card is dead,” that is often just the first guess, not the diagnosis.
The real challenge is that audio is layered. A problem may live in the Operating System, the Driver, the playback app, the speakers, the headphones, or the motherboard audio path. That is why repair-shop thinking matters: verify the symptom, isolate the layer, test methodically, and replace hardware only when evidence supports it.
Good troubleshooting does not start with replacement. It starts with proving where the failure really is.
This process also fits the kind of practical support work covered in CompTIA A+ Certification 220-1201 & 220-1202 Training. The same discipline that fixes sound problems in the field also helps technicians close tickets faster and avoid unnecessary part swaps.
For a broader technical reference, Microsoft documents playback device behavior in Windows and how audio routing changes after updates or hardware changes in Microsoft Learn. For hardware and driver-related support concepts, CompTIA’s certification objectives remain a useful baseline for entry-level troubleshooting practice through CompTIA A+.
Common Causes of Sound Card Problems
Most sound failures are not caused by a physically dead card. A working sound device can look broken when the issue is actually one layer above or below it. That is why the phrase a customer has brought a computer in to be repaired. he said he thinks that the sound card has stopped working because no audio is produced when music, video, or dvds are played. should trigger a full diagnostic process, not an immediate parts order.
Software and driver layers cause many failures
A Driver is the software bridge between the audio hardware and the operating system. If that driver is missing, corrupted, incompatible, or replaced by a bad update, audio can disappear even though the card itself is fine. Windows updates, chipset changes, and motherboard swaps are common times for this to happen.
- Corrupted driver files can stop playback without warning.
- Incompatible versions may install but fail to initialize audio correctly.
- Disabled devices can look like hardware failure in Device Manager.
- Audio enhancement tools can reroute or block output unexpectedly.
Settings and routing errors are easy to miss
Users often forget that media players, conferencing tools, and browser tabs can each use different output settings. A laptop may send audio to HDMI, Bluetooth, or monitor speakers instead of the built-in output. That is why a machine can appear silent even while the sound subsystem is technically functioning.
Output Device selection matters more than many users realize. If the wrong endpoint is selected, the system may be playing sound perfectly well to a disconnected monitor or a dock that is no longer attached.
Physical issues still matter
Loose speaker plugs, damaged jacks, front-panel audio cables, and worn ports can all produce silence or intermittent noise. The issue may be as simple as a half-seated 3.5 mm plug or a bent connector on the rear I/O panel. On desktops, a disconnected front-panel header can make the case headphone jack stop working while rear audio still functions.
For official guidance on Windows audio behavior and device management, Microsoft Learn for Windows is the most reliable starting point. If you are dealing with portable devices and alternate output hardware, the same troubleshooting logic also applies to a carte son pc portable, because laptop audio failures are often routing or driver problems rather than a damaged motherboard.
Start With the Fastest, Lowest-Risk Checks
Start with checks that cost nothing and can be done in under five minutes. This is the fastest way to separate a real hardware failure from a simple configuration problem. It also prevents you from chasing the wrong fault too early.
-
Confirm the symptom with known-good audio. Use a system sound, a local MP3, or a standard test video that you know includes audio. Avoid blaming the sound card until you have heard silence from more than one source.
In a repair shop, this is where you verify whether the problem is system-wide or limited to one application. If Windows alert sounds play but YouTube does not, the issue is probably app routing, browser settings, or tab audio rather than the audio hardware.
-
Check all volume controls. Inspect the system volume, the app volume, and the physical controls on the speakers or headset. A muted application with the system volume turned up is one of the most common false alarms.
Windows Volume Mixer can also reveal hidden low-volume or muted channels. On some systems, the keyboard mute key or the speaker knob on the monitor causes silence that users forget to mention.
-
Verify the correct output device. When HDMI, Bluetooth, docking stations, USB audio, or monitor speakers are present, Windows may route sound to the wrong endpoint. Open the sound menu and confirm that the intended device is selected as the default output.
This matters a lot on laptops. A user can unplug a dock, switch to Bluetooth headphones, and then wonder why nothing comes out of the built-in speakers because the system still points to the old device.
-
Test with known-good speakers or headphones. Swap in a second pair of headphones or speakers to rule out a bad accessory. If the alternate device works, the sound card is probably fine and the fault is external.
This is the cheapest and cleanest isolation test you can do. It also protects you from replacing hardware when the real problem is a failed cable or damaged speaker set.
-
Check mute, jack seating, and front-panel controls. Confirm that plugs are fully seated, front-panel volume knobs are not turned down, and the audio jack is not loose. A slightly inserted connector can cut sound entirely or cause crackling and one-channel playback.
If the machine has both front and rear audio ports, test both. If the rear jack works and the front jack does not, the issue is probably not the sound card itself.
Check Windows Sound Settings and Device Status
Windows sound settings can make a healthy audio device look broken. If the playback device is disabled, hidden, or set to the wrong default, the system may send sound nowhere useful. This is especially common after a dock is connected, a monitor is added, or Windows installs a feature update.
Open the sound settings and inspect the playback device list. Look for the expected audio device name, check whether it is enabled, and confirm it is set as the default. If the device is missing, Windows may not be loading the driver correctly or the hardware may not be detected at all.
What to look for in Device Manager
Device Manager is the first place many technicians check when audio vanishes after an update or hardware change. A warning icon, an unknown device, or a device that disappears after reboot often points to driver trouble. In some cases, the device is present but not functioning because the driver stack failed to initialize.
- Yellow warning icons often mean driver or resource issues.
- Disabled devices can be re-enabled from the context menu.
- Missing devices may indicate BIOS, firmware, or detection problems.
- Wrong default device means audio is going somewhere else.
Why updates can change audio behavior
Windows updates can replace audio components, change endpoint names, or reset default playback selections. A speaker setup that worked yesterday may suddenly route to HDMI after a reboot. That is why a user may swear the sound card failed when the real issue is a settings change caused by the update process.
For current Windows audio and device troubleshooting guidance, Microsoft’s audio driver documentation is a strong vendor reference. If you are troubleshooting a desktop or laptop that uses multiple endpoints, the same logic applies whether the device is onboard audio or a usb soundkarte connected through a USB port.
Troubleshoot Drivers and Audio Software
A bad driver can produce no sound, distorted sound, or intermittent sound. The driver may install cleanly and still fail under load, especially after an operating system update or chipset change. That is why simply seeing “the driver is installed” does not prove the audio path is healthy.
-
Check the installed version first. Compare the driver version in Device Manager against the system vendor’s support page or the motherboard audio chipset vendor’s release notes. If the installed version is older, corrupted, or clearly mismatched, update it from a trusted source.
Do not pull random audio packages from unverified sites. Use the system builder, motherboard vendor, or official chipset support source so you know the driver matches the hardware.
-
Roll back recent changes when the failure started after an update. If audio disappeared immediately after a driver or Windows update, use Device Manager to roll back the driver. This often restores output faster than a clean reinstall, especially when the new release introduced a regression.
If roll back is unavailable, uninstall the device, reboot, and let Windows detect it again. That can clear a corrupted driver stack and force a fresh initialization.
-
Remove conflicting audio utilities. Vendor enhancement suites, surround-sound tools, and equalizer apps can interfere with playback routing. Some packages layer effects on top of the real driver and create a silent failure even though the device itself is present.
When troubleshooting, simplify the environment. Disable enhancements, close audio control panels, and test the bare driver before adding features back.
-
Check for application-level audio overrides. Conferencing tools, browsers, and games sometimes store their own device preferences. A browser tab may be muted, a game may be set to a disconnected headset, or a media app may output to a non-default endpoint.
If system sounds work but one app does not, the sound card is not the first suspect. Application routing is.
For workstation and driver hygiene guidance, the official Microsoft Learn pages are more useful than third-party advice because they document the supported update and device model. If the job involves a consumer desktop, laptop, or a tarjeta de sonido de una computadora, the same driver principles apply across languages and form factors.
Rule Out Cabling and Port Problems
Audio problems that seem electronic are often physical. A cracked plug, dust in the jack, a damaged speaker cable, or a loose internal header can all cause silence. Before you declare the sound hardware bad, inspect the entire signal path from output device to port.
Inspect external connections
Check rear audio jacks, front-panel audio ports, speaker plugs, and headset connectors. Wiggle the cable lightly while audio is playing; if sound cuts in and out, you may have an intermittent connector rather than a failed sound card. If the issue appears only on one port, the port itself may be worn or damaged.
- Rear panel ports help isolate motherboard audio from case-front wiring.
- Front-panel ports help reveal header and cable problems.
- Known-good cables remove uncertainty from the test.
- Headsets with inline controls can fail independently of the PC.
Check internal audio connections on desktops
On desktop systems, the front-panel audio connector usually plugs into a motherboard header. If that header is loose, miswired, or damaged, the front jack may stop working even though rear audio is fine. This is a classic repair-shop clue because it points to case wiring rather than the sound controller.
If you are working on a field repair or a bench system, swapping in a spare cable or a known-good headset is faster than disassembling hardware too early. This is also a practical place to compare a discrete card to onboard audio if both are available.
For hardware-level concepts and component isolation, the glossary definition for Hardware and the general support principles in CompTIA A+ Certification 220-1201 & 220-1202 Training align well with this kind of physical troubleshooting.
Test for Application-Specific or File-Specific Issues
If sound works in one place but not another, the problem is probably not the sound card. Application-specific issues are common in browsers, conferencing tools, streaming apps, and games because each one can manage audio differently. That is why you must separate system-wide failure from app-specific failure early.
Start by asking a simple question: do Windows sounds play? If yes, the OS can output audio. Next, test media in a second application. If one player works and another does not, the failed app may have a corrupted setting, a bad audio output selection, or a damaged media file.
- Compare system sounds to app playback. If alert sounds work but a media player does not, the fault is likely inside the app.
- Check browser and tab audio. Browsers can mute individual tabs or output through the wrong endpoint after device changes.
- Review conferencing settings. Meeting apps often store separate speaker and microphone selections.
- Test multiple file types. A damaged MP3, muted video, or broken DVD can mimic hardware failure.
A useful repair habit is to test the same content in more than one app. If a movie file has no audio in one player but works in another, you are probably dealing with file corruption or player configuration, not a dead audio card. This is exactly the kind of structured thinking that stops technicians from replacing working parts.
Identify Symptoms That Suggest True Hardware Failure
True sound card failure is less common than software or configuration problems, but it does happen. The key is to look for patterns that survive every software and connection test. One failure on one app is not enough evidence. Failure across multiple operating systems, user profiles, and known-good accessories is much stronger evidence.
Signs that point toward hardware trouble
Crackling, distortion, one missing channel, repeated device drops, and complete silence across all outputs can indicate a real hardware fault. So can a device that vanishes and reappears in Device Manager after every reboot. Liquid damage, overheating, electrical surge exposure, and physical shock make hardware failure more likely.
- Persistent silence across speakers, headphones, and system sounds.
- Repeated detection failure after driver reinstall.
- Failure in another operating system such as a live USB environment.
- Visible physical damage to ports, card edges, or connectors.
If you see these symptoms, you are much closer to a hardware diagnosis. Still, do not skip the isolation tests. A faulty USB dock or bad speaker cable can look identical to a dead onboard audio controller.
The best hardware diagnosis is one you can defend. If the failure survives known-good accessories, alternate profiles, and alternate boot environments, then replacement becomes a rational decision instead of a guess.
For audio-device behavior on Windows, Microsoft’s Core Audio documentation is useful when you need to understand what the operating system is doing underneath the visible settings panel.
Use Diagnostics to Isolate the Fault
Diagnostics reduce guesswork. They tell you whether the fault lives in the operating system, the user profile, the driver stack, the cabling, or the audio hardware itself. The goal is not to run every possible test. The goal is to run the fewest tests that isolate the fault cleanly.
-
Run built-in troubleshooters. Windows can often detect muted devices, disabled endpoints, or obvious configuration conflicts. The results are not perfect, but they can give a fast clue about the failure path.
Use the output from the troubleshooter as a starting point, not as the final answer. If it suggests a default device mismatch, verify it manually.
-
Boot from a live USB or recovery environment. If onboard audio works outside the installed OS, the hardware is probably fine and the problem lives in the current Windows installation or its drivers. If it still fails, the case for hardware failure gets stronger.
This test is especially valuable on desktops where reinstalling Windows would be too expensive or disruptive before you have evidence.
-
Try a different user profile. A profile-specific setting or corrupted audio preference can silence one account while another account works normally. That is a common clue in shared workstations and lab machines.
If the new profile works, you have narrowed the issue to the user environment rather than the sound card.
-
Test with external audio hardware. A USB headset or USB audio adapter can bypass the onboard audio path entirely. If external audio works immediately, the onboard device, its driver, or the board itself is the likely fault.
This is also where a temporary workaround can keep a user working while you plan a proper repair.
-
Document each result. Write down what worked, what failed, and under what conditions. That record helps you avoid repeating tests and makes the final diagnosis defensible.
In real support work, good notes save time on every follow-up ticket.
If you need to compare consumer-grade external audio options during isolation testing, a simple 5core external usb 2.0 3d virtual 7.1 channel audio sound card adapter can be used as a basic bypass device. The specific brand is less important than the fact that USB audio lets you prove whether the onboard path is the problem.
Repair, Replace, or Bypass
Once the fault is isolated, the next decision is whether to repair the existing setup, replace the hardware, or bypass the problem altogether. Not every audio failure deserves a new sound card. The best choice depends on cost, downtime, and how critical the machine is to the user.
When a software fix is enough
If audio returns after selecting the correct output, restoring a driver, or changing one setting, you do not need hardware replacement. That result tells you the sound card was never the real problem. You simply had a configuration failure, a driver issue, or a routing problem.
When replacement makes sense
If the machine uses a discrete sound card and every test points to hardware failure, replacement is reasonable. Confirm compatibility with the motherboard, available slots, and the operating system before buying a new card. If the onboard controller is dead, however, replacing the motherboard may be overkill when a USB audio solution will meet the user’s needs.
When bypassing is smarter
A USB sound adapter or external audio interface can restore service quickly when the onboard path is failing. This is often the best short-term fix for a user who just needs reliable sound for meetings, training, or media playback. It can also buy time while you wait for parts or schedule a larger repair.
| Repair Path | Best for driver, settings, or app-level problems |
|---|---|
| Replace Path | Best when failure is proven across tests and hardware is clearly defective |
| Bypass Path | Best when uptime matters more than restoring the original audio path |
For external device behavior and endpoint changes, the same troubleshooting discipline used with a Bluetooth headset or docked laptop applies here: prove the path, then decide whether to repair the path or route around it.
Prerequisites
Before starting a sound card troubleshooting job, make sure you have the basics in place. Without them, the process becomes trial and error instead of diagnosis.
- Known-good speakers or headphones for A/B testing.
- Access to Windows settings and Device Manager with local administrative rights if driver changes are needed.
- A known-good audio file or system sound for repeatable playback testing.
- Access to the system vendor’s support page for validated driver downloads.
- Basic hand tools if you need to inspect desktop audio headers or rear I/O connections.
- Backup or change control approval if the system is production-critical.
If you are troubleshooting on a shared workstation or classroom PC, it also helps to have a second user account available for comparison testing. That one extra test often tells you whether the fault is system-wide or profile-specific.
How to Verify It Worked
The fix is real only if audio returns under normal use, not just after one test sound. Verification should prove that the problem is gone across the most common playback paths.
- Play a system sound. Confirm that Windows alert sounds are audible through the intended device.
- Test media playback. Open a music file, video, or DVD and verify that audio is present.
- Check multiple apps. Test at least one browser, one media player, and one conferencing app if the user uses all three.
- Reconnect and retest hardware. Unplug and replug the speakers or headset to ensure the fix is stable.
- Restart the system. A reboot confirms the setting or driver change survives normal startup.
Common signs of an incomplete fix include sound returning only after a manual device switch, audio failing again after sleep, or output working on one port but not another. Those symptoms mean the issue is only partly resolved and should be revisited before closing the ticket.
If you need to validate audio after a repair on a laptop or desktop, the strongest proof is simple: the same device should play sound after a reboot, after sleep, and across at least two different applications. That is the standard you want before handing the machine back.
Key Takeaway
- No audio does not automatically mean a dead sound card. Driver, output selection, app routing, and cabling problems are more common.
- Test in layers. Start with system sound, then speakers or headphones, then Windows settings, then drivers, then hardware.
- Use known-good accessories. Swapping in a different headset or speaker set quickly separates external faults from internal ones.
- Hardware failure should survive multiple tests. If audio still fails in a live USB environment and across user profiles, replacement becomes more likely.
- USB audio is a practical workaround. It can restore service while you plan a permanent repair.
Prevent Future Sound Card Problems
Prevention is mostly about keeping the audio stack clean and predictable. That means using trusted driver sources, avoiding unnecessary enhancement software, and checking playback settings after major changes. Small habits reduce repeat tickets.
Keep audio and chipset drivers current from the system or motherboard vendor. Do not rely on random downloads that may not match the installed hardware revision. Update only when the new version is validated, and document what changed so you can roll back if needed.
- Review sound settings after OS updates. Updates can change the default output device or reset enhancements.
- Avoid unnecessary audio utilities. Extra enhancement layers often create more support work than they solve.
- Use surge protection. Electrical events can damage ports and audio circuitry.
- Shut systems down properly. Abrupt power loss can corrupt driver or profile settings.
- Test audio after docking or hardware changes. Endpoint routing can shift without warning.
This kind of preventive maintenance aligns well with the practical skills taught in CompTIA A+ Certification 220-1201 & 220-1202 Training. Technicians who routinely verify audio after changes spend less time firefighting and more time resolving actual root causes.
For broader hardware reliability guidance, the U.S. Bureau of Labor Statistics Occupational Outlook Handbook shows that support roles remain centered on troubleshooting, device replacement, and user support tasks. That is exactly why disciplined diagnostics matter in everyday repair work.
CompTIA A+ Certification 220-1201 & 220-1202 Training
Master essential IT skills and prepare for entry-level roles with our comprehensive training designed for aspiring IT support specialists and technology professionals.
Get this course on Udemy at the lowest price →Conclusion
When a customer says the sound card stopped working, do not assume the card is dead. No audio is more often a driver, settings, cabling, or application issue than a true hardware failure.
The right troubleshooting order is straightforward: confirm the symptom, check volume and output selection, test known-good speakers or headphones, inspect Windows sound settings, review drivers, check cables and ports, and only then consider replacement. That method saves time, avoids unnecessary parts swaps, and restores audio with less guesswork.
Methodical diagnostics are the difference between a quick fix and a wasted repair. Use the evidence, follow the layers, and you will find the fault faster.
For hands-on practice with the troubleshooting habits that make these repairs easier, ITU Online IT Training’s CompTIA A+ Certification 220-1201 & 220-1202 Training is a solid place to build the workflow that support technicians use every day.
CompTIA® and A+™ are trademarks of CompTIA, Inc.
